Creating Your Personal Account
Learn how to sign up for timepeep and set up your personal scheduling page in minutes.
Visit the timepeep Homepage
Go to timepeep.com and click the "Get Started" button in the navigation bar or the hero section.

You can also click "Start Free" for quick access to the signup page.
Fill in Your Details
Enter your first name, last name, email address, and create a secure password. Your password must contain at least 8 characters including uppercase, lowercase, numbers, and special characters.
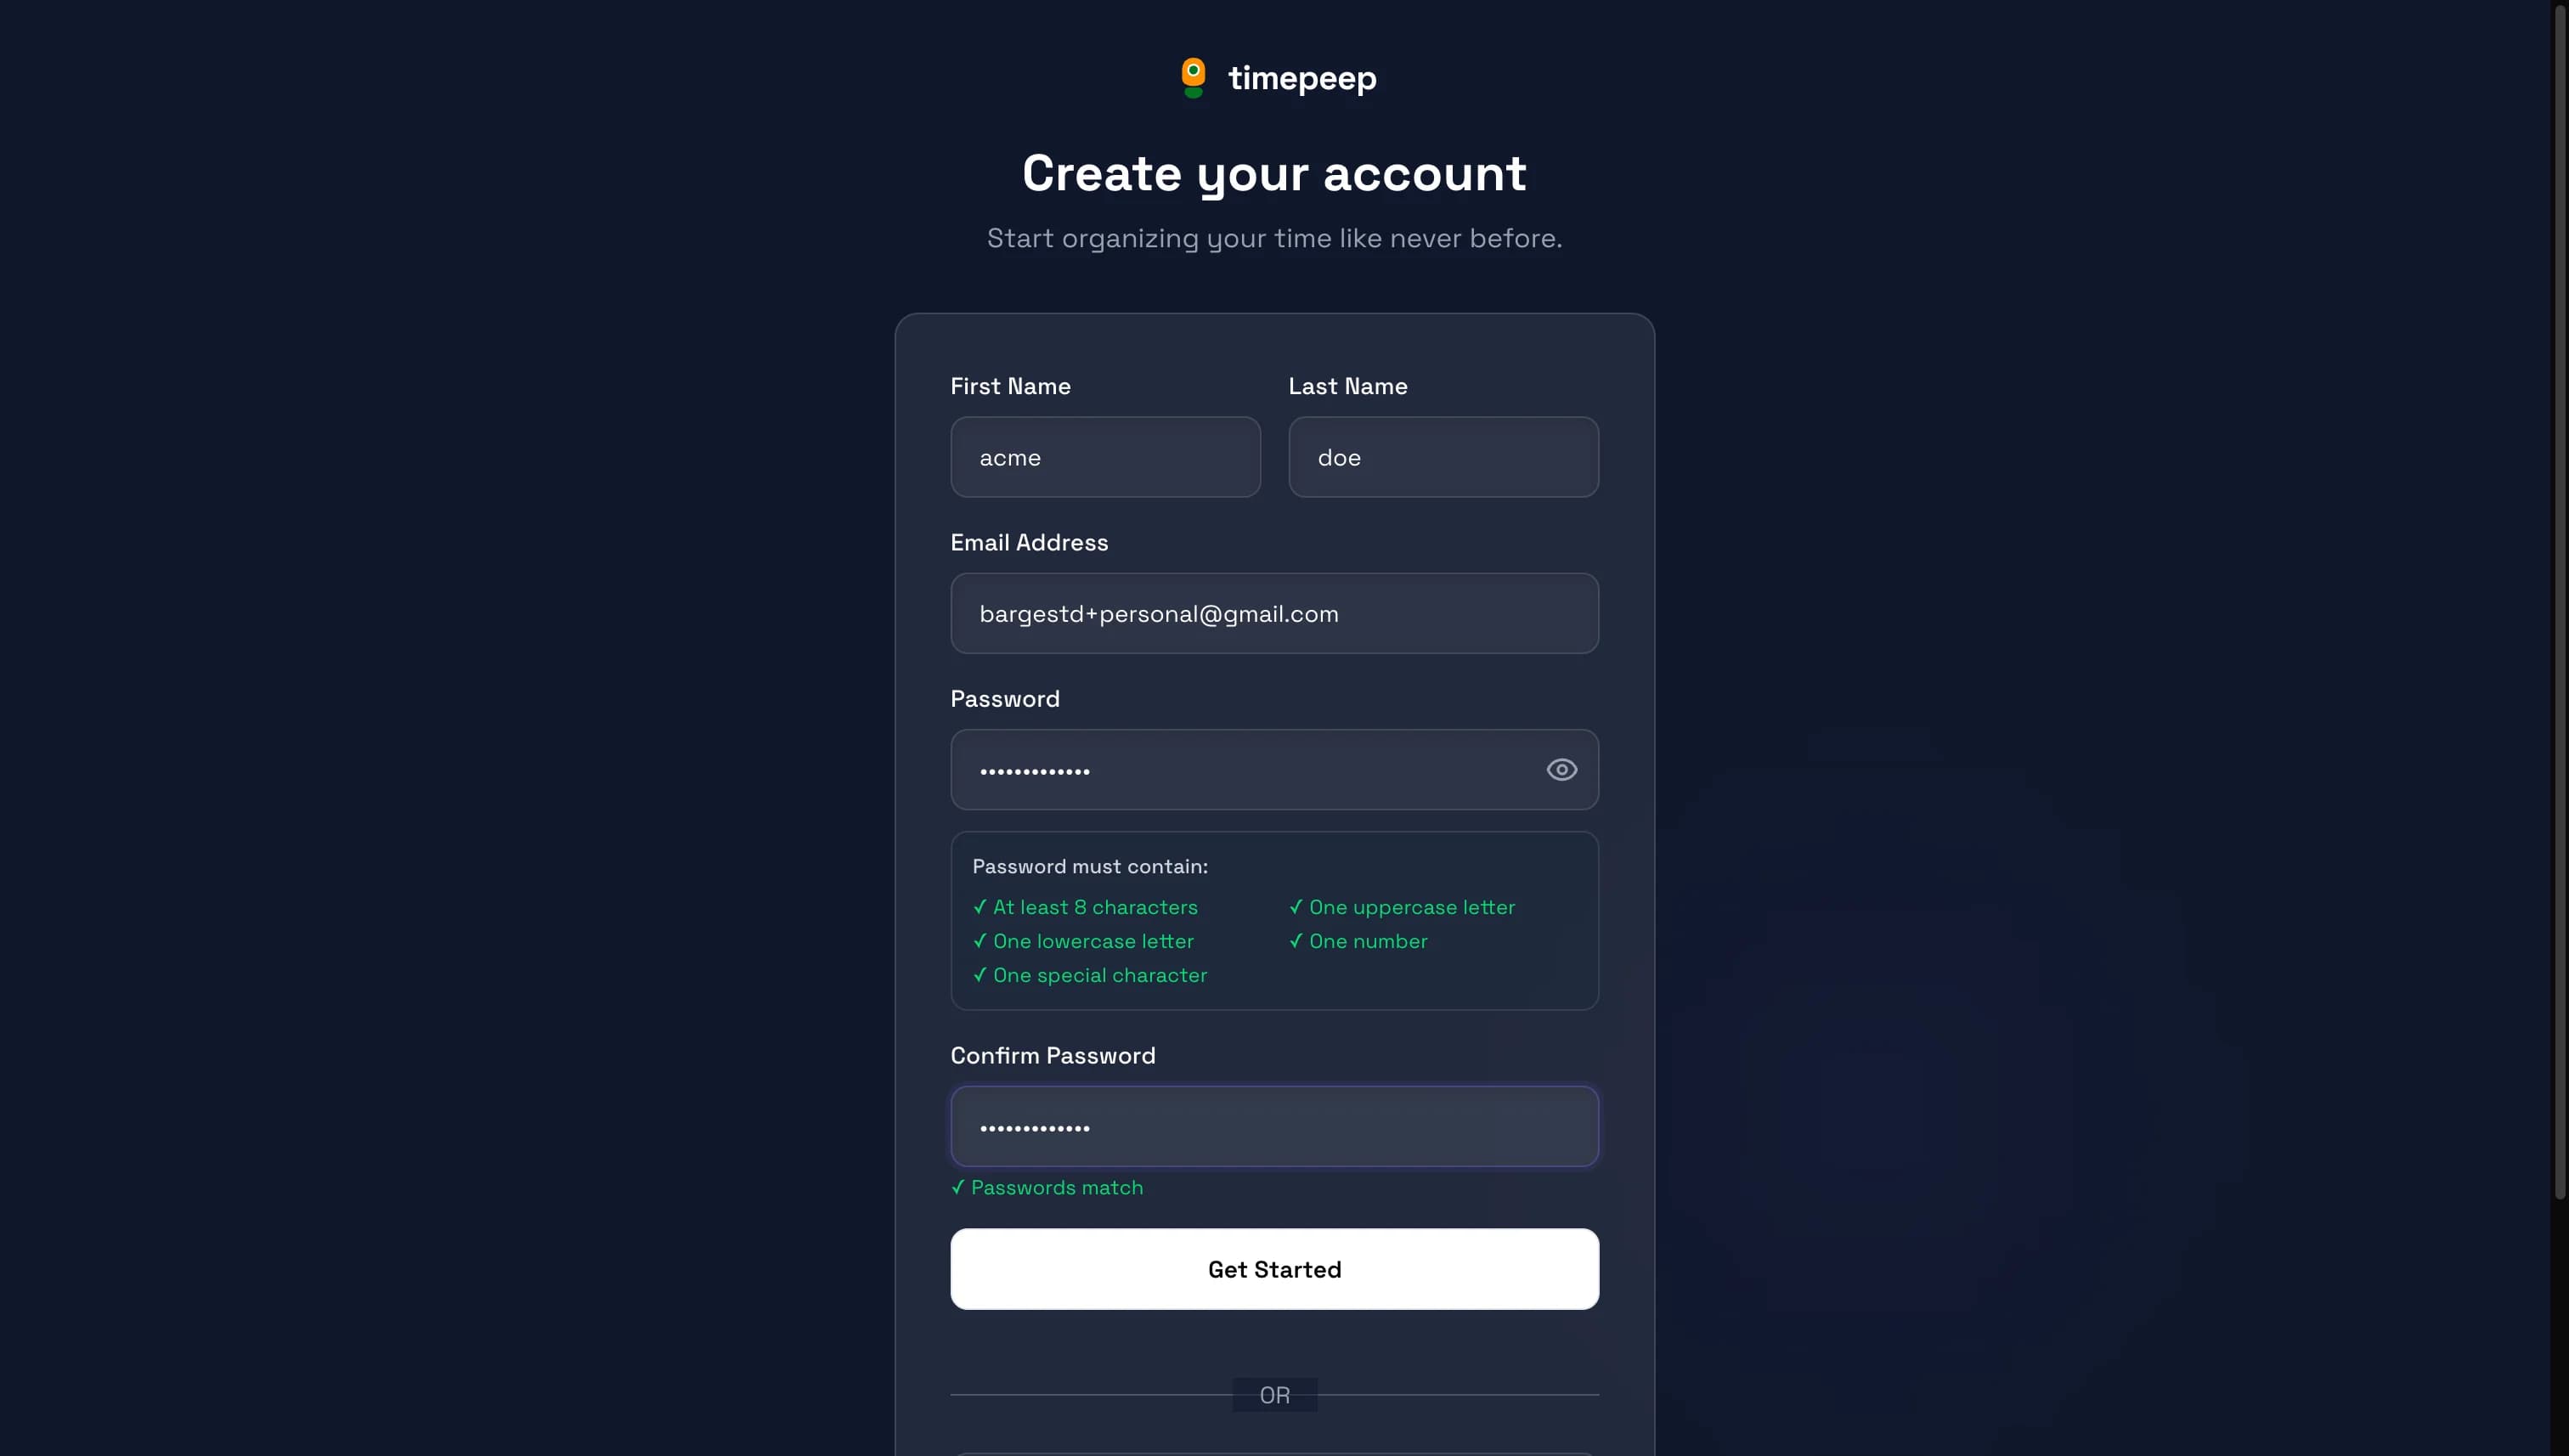
Use a strong, unique password that you don't use for other services.
Verify Your Email
Check your email inbox for a verification code. Enter the 6-digit code on the verification page to confirm your email address.
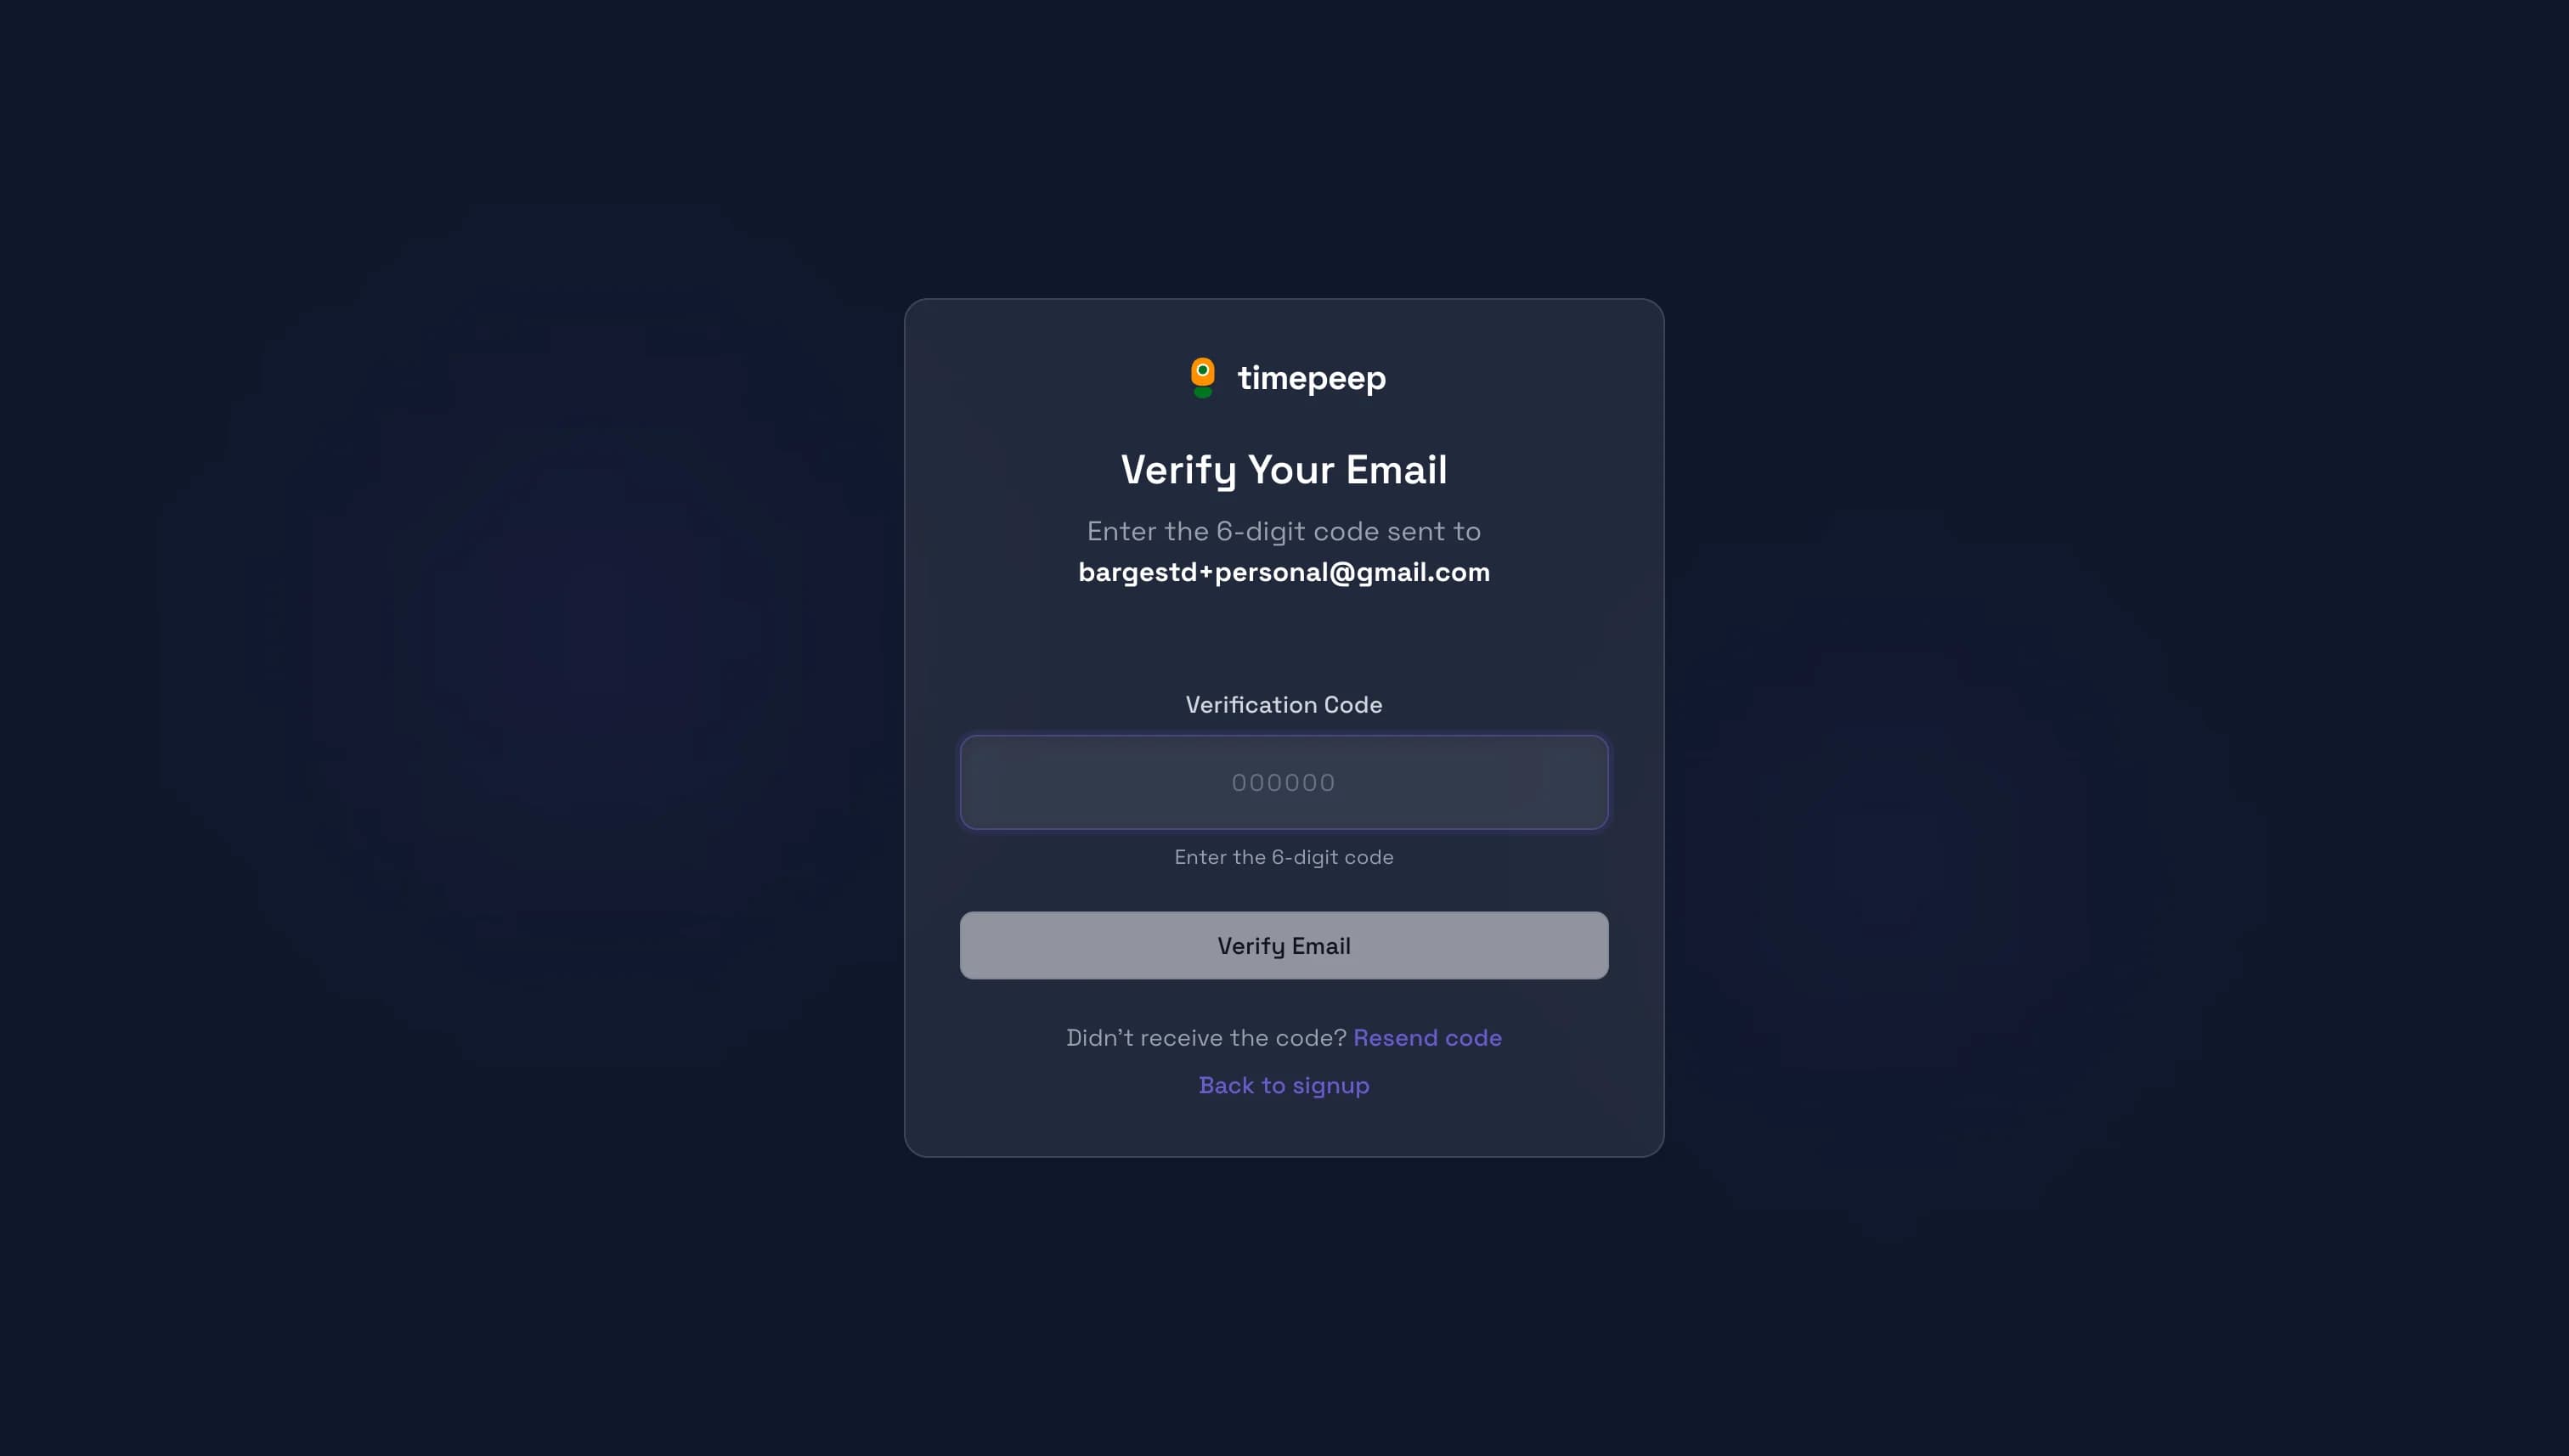
Check your spam folder if you don't see the email within a few minutes.
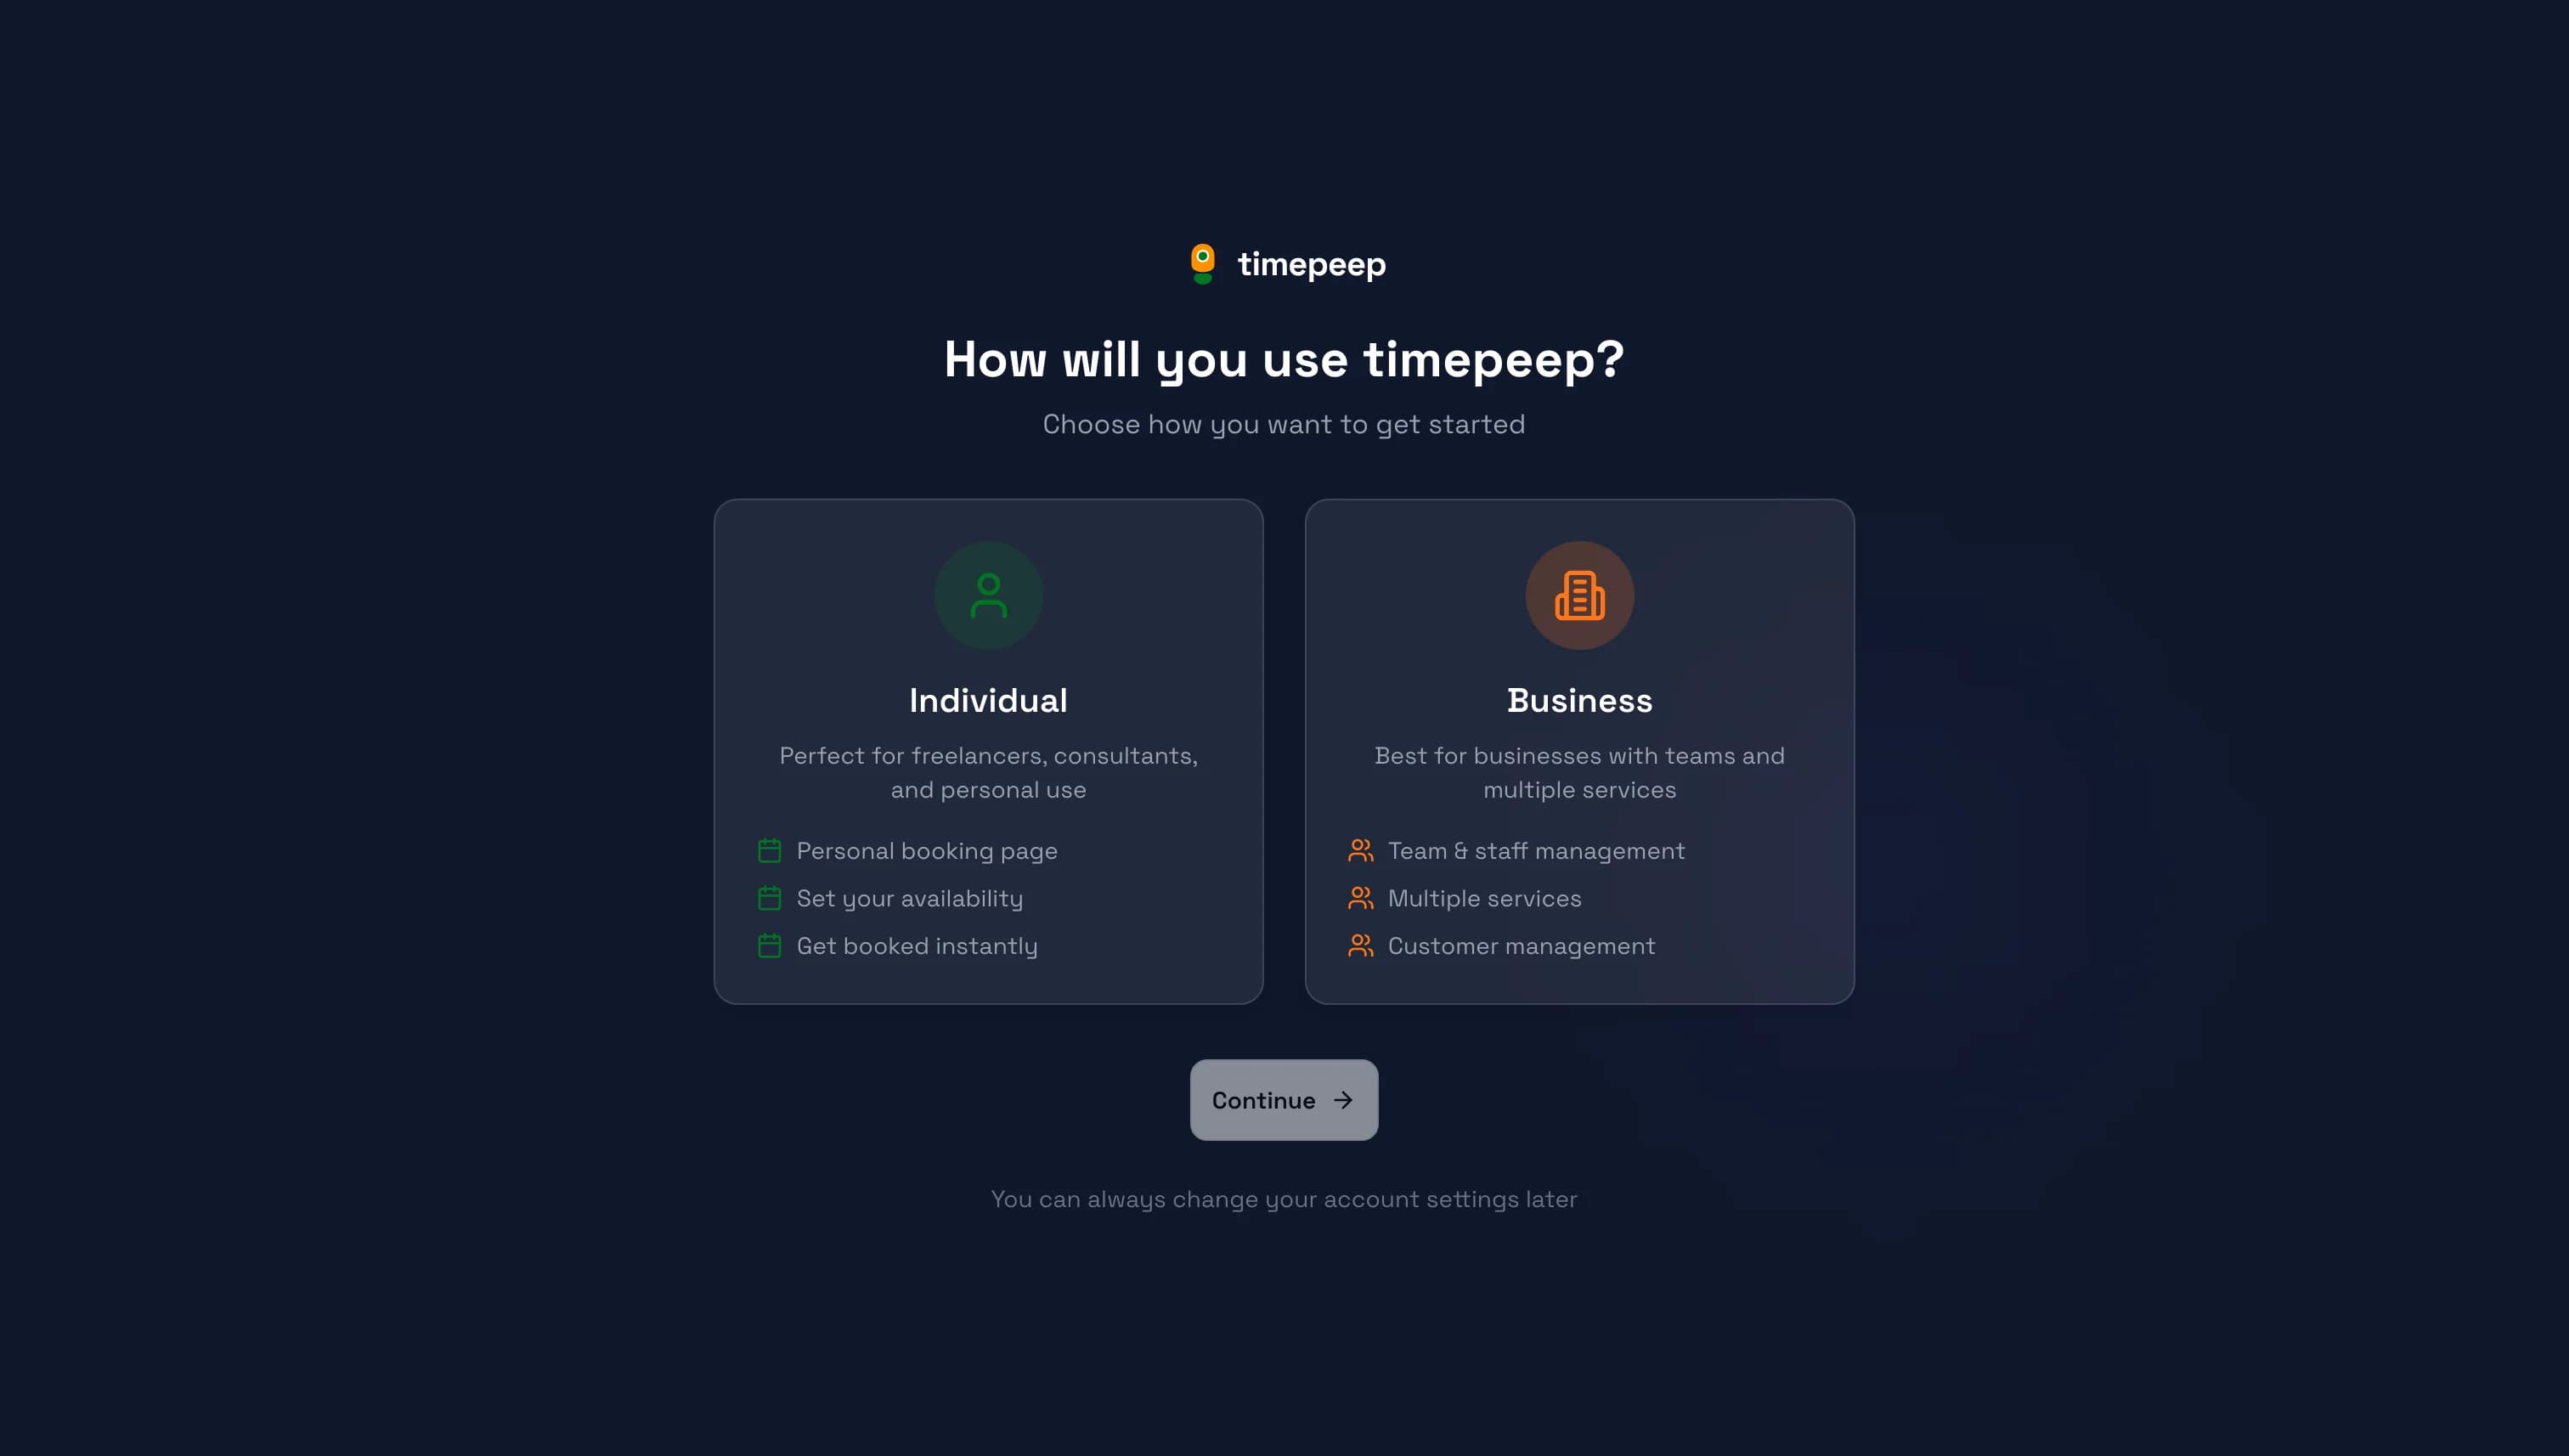
Choose Your Account Type
Select "Individual" for personal scheduling or "Business" if you need team management features. Individual accounts are perfect for freelancers, consultants, and personal use.
Set Your Booking URL
Choose a unique username for your booking page URL (e.g., timepeep.com/u/yourname). This is the link you'll share with clients to let them book meetings with you.
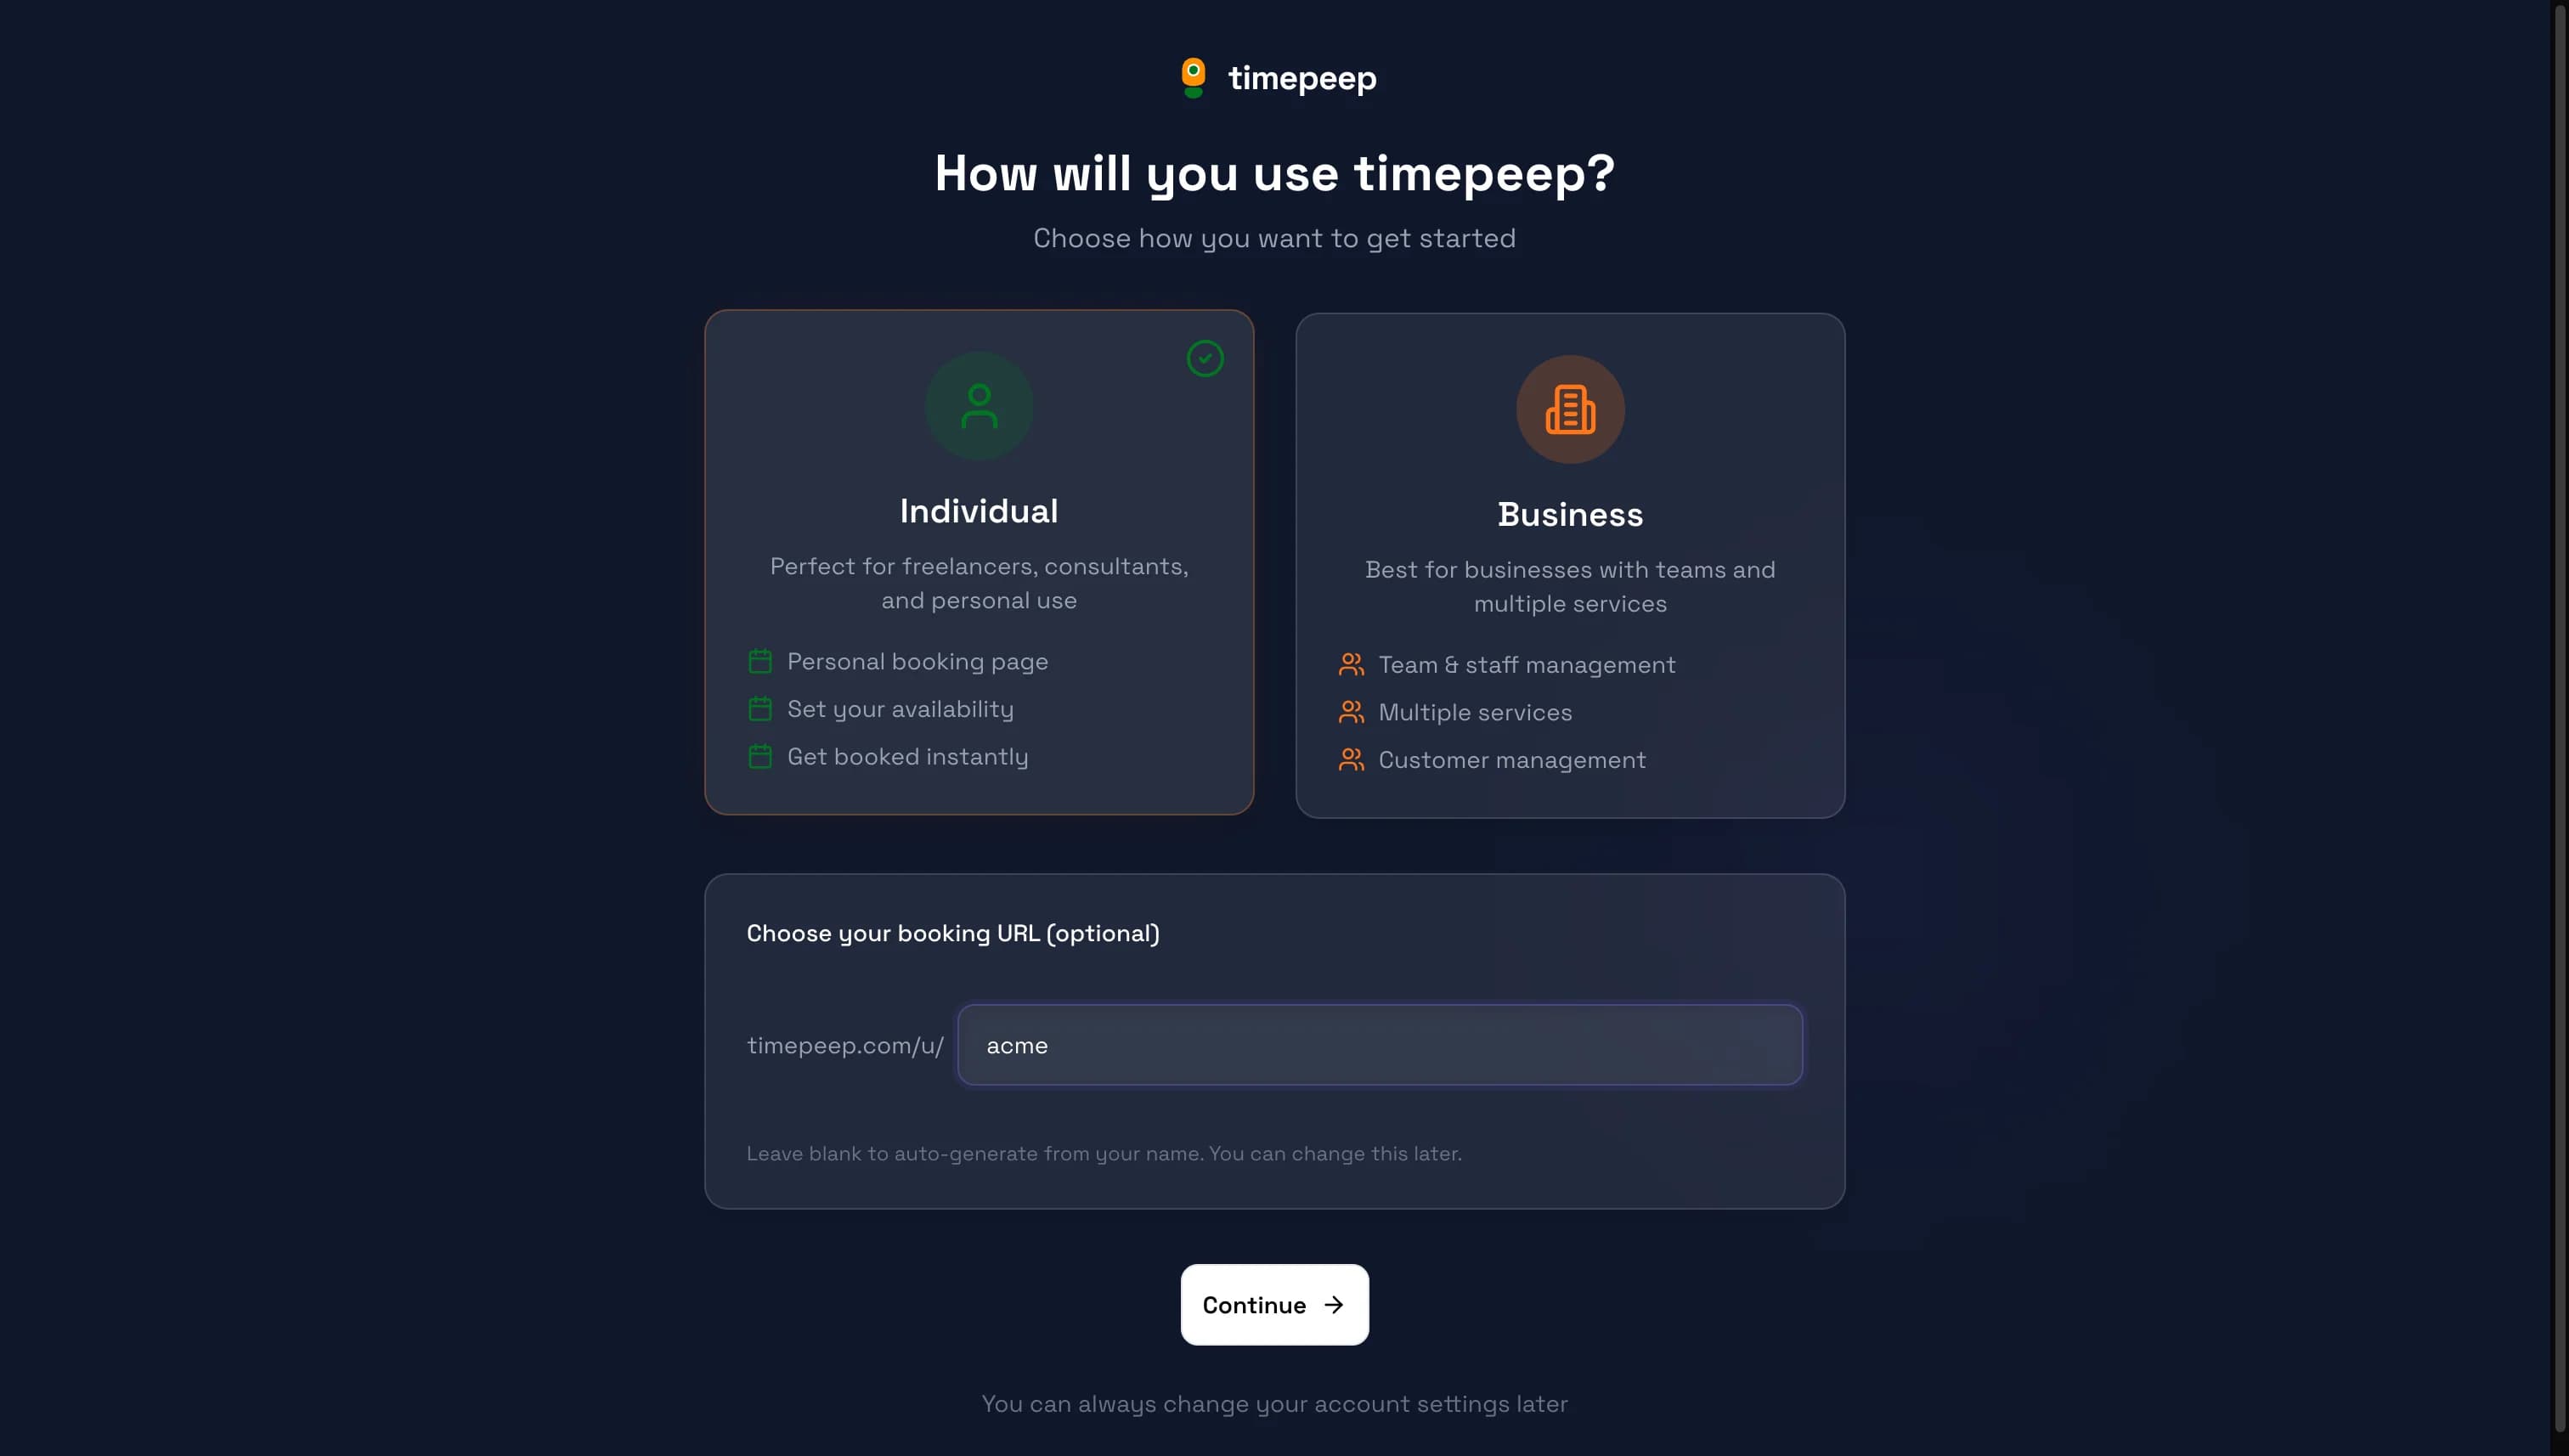
Choose something professional and easy to remember, like your name or business name.
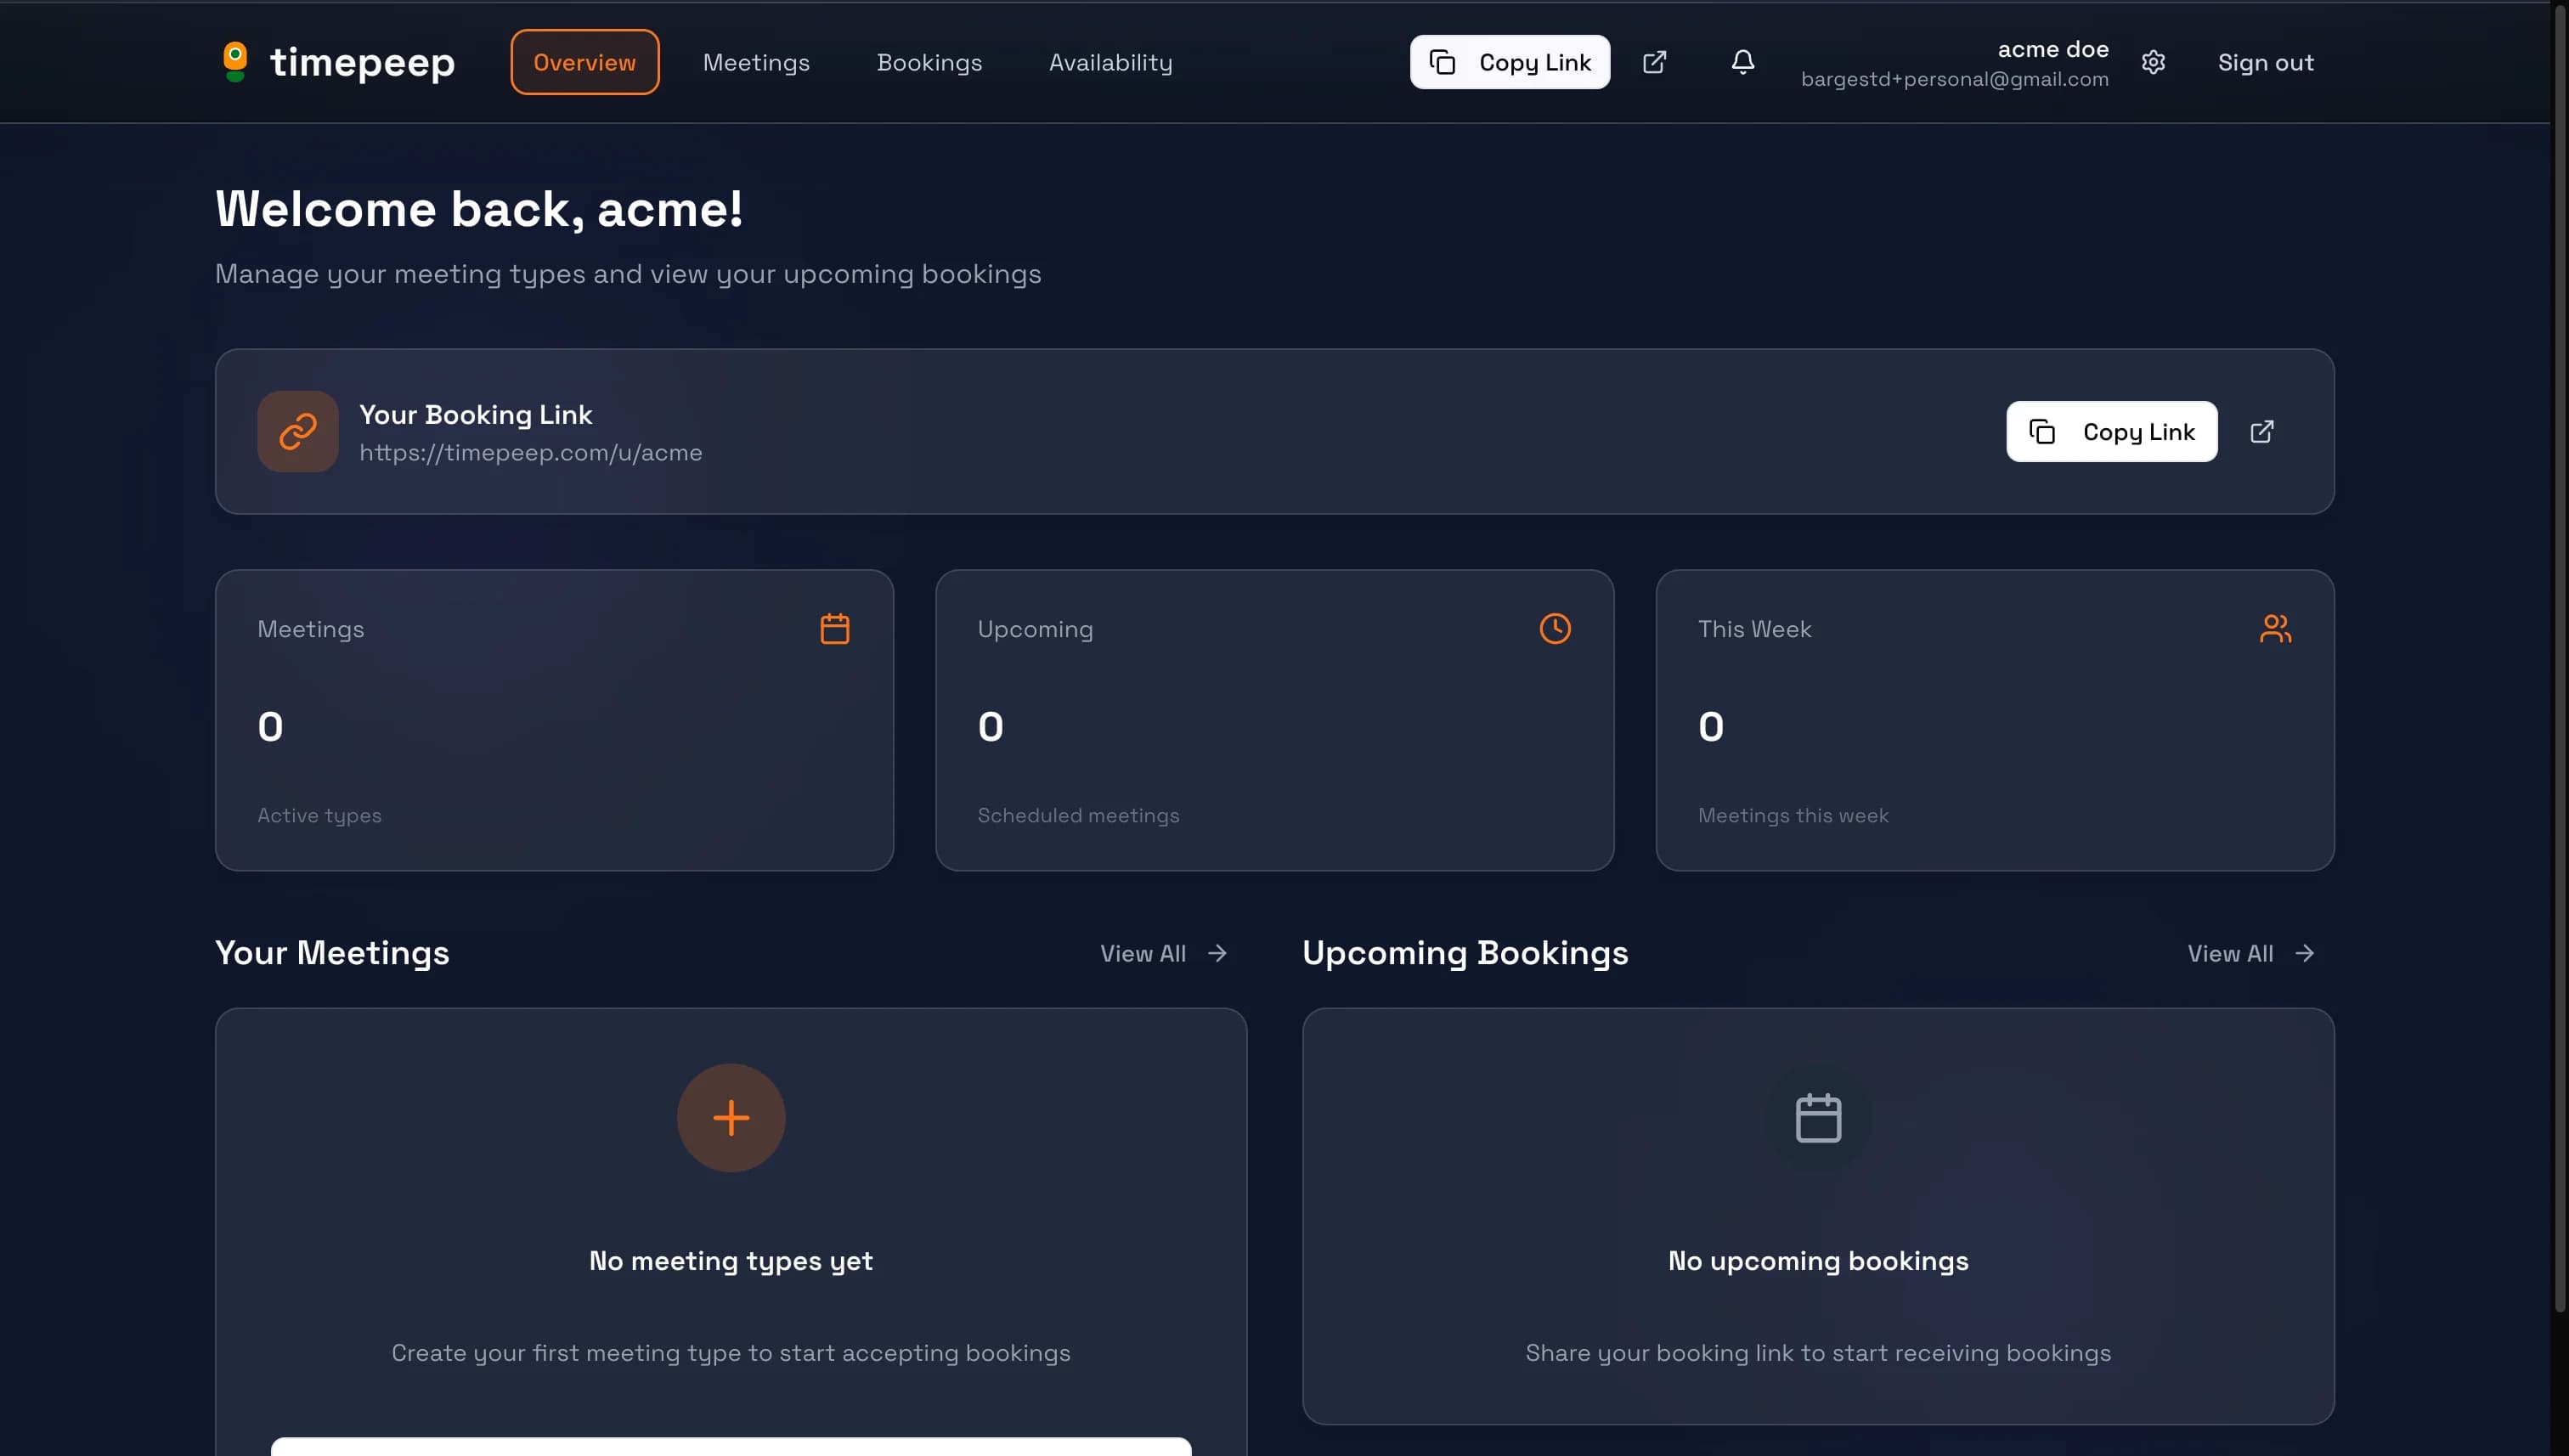
Welcome to Your Dashboard
You're all set! Your personal dashboard shows your booking link, meeting statistics, and quick access to create meeting types and manage bookings.
You're all set!
You've completed this guide. Check out the related guides below to learn more.